Mass Effect 3 Head Morph
Headmorphs let you swap appearances between save games and you'll recognize them by the file extension .me3headmorph.
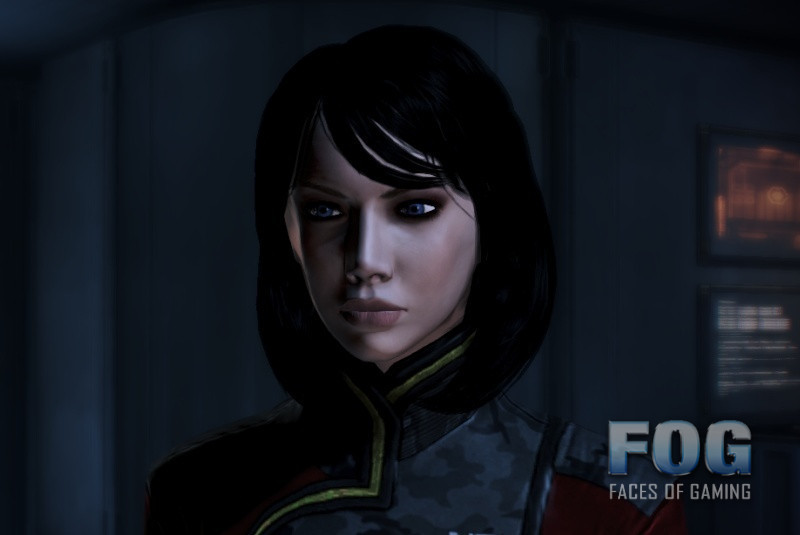
Taylor Shepard - FemShep Head Morph and Face Code. This is a head morph, to be used with Gibbed ME3 Save Editor.
Download the latest version of Gibbed's ME3 Savegame Editor.
Open up Gibbed's save editor and you will see a row of buttons and 2 rows of tabs.
1. Hit 'Open' and load the save game you want to edit.
2. Navigate to the 'Appearance' tab in the bottom row of tabs, next to 'Basic'.
3. There will be 2 drop-down menus: 'Head Morph' and 'Presets'
Click 'Head Morph' and you will see two options, click 'Import from File..'
A navigation window will open for you to find your desired head morph.
In the case of my customized Femshep it will be 'ELE_defem_brunette.me3headmorph'
or just 'ELE_defem_brunette
 ' if you don't have file extensions visible.
Select it and hit 'Open'
Now at the top of Gibbed, hit 'Save' and either create a new save file or overwrite your existing one. It's always a good idea to make a new one if your not sure of the results of your tweaks.
If you load up your save in Mass Effect 3, your Shepard should have new face.
Hello there,
I've had Daz3D for about a month, and i'm reaching the point where i'd like to experiment with the more 'technical' side of things; specifically character morphs and how to create them.
The primary reason for this is I made the switch from XNALara to Daz3D after being impressed by the ease of posing, animation, and how easy it is to 'tweak' the various base characters with hairstyles, faces, morphs etc. This beats spending hours in Blender or diving through several import/export dialogues just to change hair and / or clothes.. but i've hit my first 'wall' when it comes to importing custom meshes / characters into Daz3D, because I have no idea how to do it! :)
Now, I found a free 'Mass Effect Races' morph pack, with various sliders for various races - some more drastic morphs than others. I've also played with various Monster packs, some ranging from altered ears and eyes to complete head / body re-shaping. I've basically got a handful of non-human head / body shapes that i'd made for use in XNALara, and they aren't quite as wild as some of the aforementioned morphs, so i'm hoping with some help and pointers in the right direction (..and a little experimentation!) i'll be able to 'convert' / re-create them for use in Daz3D
Basically, I know what i'm doing in Blender and understand a lot of things to do with texture maps, and I understand that head morphs work along the lines of having to require the same amount of vertices as the original head mesh - i'm not 100% sure why, though I imagine it's to do with facial posing / animation and interaction with other sliders. I gather that means having to re-do the texture to fit the base head, but that won't be a problem.
Essentially; how do full body / head morph sliders work, how hard / complex will it be to create a custom one from scratch (using a base model such as Genesis 2), and what sort of program would I need to use to achieve it?
All input / suggestions are welcome!
P.S. I've already imported various .obj files, both existing and freshly made ones - though i'm aware it won't be as easy as simply importing a head shape .obj since morphs affect one of the base character models such as Victoria 4 or Genesis; also even if a full body could be rigged with bones and posed, it'd be far superior to just have a morph file rather than a seperate 'object' pretending to be a character.. a concept that XNALara's based around, but Daz3D isn't
Comments
- edited December 1969
A morph, at least as implemented in Poser and DAZ Studio (and modo and Lightwave) is just a list of deltas - offsets to the position of the vertices making up the mesh. As a result it is absolutely dependent on having the vertices in the OBJ defining the new shape in the same order as those in the base model, otherwise the wrong vertices will be moved to each position and you will end up with a cat's cradle of a surface zigging and zagging within the bounding shape of the intended morph.
So to make a morph you have to take the mesh (in it's base resolution, not sub-divided) and deform it without adding or removing anything, then import that as a morph target. DS will then compare the vertices in the new OBJ with those in the base model and where they differ will add a delta to the morph. When you dial a morph in the morph value is multiplied with the delta to give a final shift in position. That's why morphs don't work for rotations - they move each of the mesh vertices in a straight line only. You can certainly create morphs in Blender, but goign from a shape that isn't a deformation of the model you want to morph to one that is will be trickier - with luck you may be able to scale the shape you want to copy to match the imported figure mesh in position and scale, then deform the mesh with some kind of constraint or snapping function on to get it to match the target shape.
- edited March 2014
So something along the lines of;
1. Export the Genesis 2 Male or Female from Daz3D;
2. Import into Blender;
3. Also import the head shape/morph desired into Blender;
4. Reshape the Genesis 2 head using a sculpt / reshape brush to match the desired shape/morph;
5. Clean up and export the result;
6. Import the reshaped mesh into Daz3D as a morph target for a Genesis 2 character?Will that sort of process work? I haven't really experimented with 'morph targets' so there'll be some learning going on there!
I have tried importing a character into Blender and can see the 'head' itself is made up of various parts; nostrils, ears, eyelashes, the face, the back of the head etc. Will it be fine to just merge all the meshes, go wild with a resculpt, then split them up along the same vertices afterwards?
(For example, one of the heads is based on a snake and has no ears, so if I simply smoothed them out and sculpted a cobra-like 'hood' which combined the vertixes from the ears and also the front and back of the head, would that still be fine and 'recogniseable' as a morph when split back down?)
Post edited by EternalWinds on - edited December 1969
Yes, the numbered steps look about right to me, as a non-user of Blender.
Download robson jerome take two rare pokemon. You should work on the complete mesh, splitting it and recombining - particularly on the ears, say, which are a welded part of the figure (unlike the eyes which are not attached) - is almost certain to mess up the vertices.
Yes, you can smooth the ears into the head and then resculpt them - but bear in mind that morphs are dumb, they just move the affected points a distance and direction set by the deltas, so any morph that affects the ears is unlikely to mix safely with your snake head. The way to deal with this, used most often with expression morphs, is to make a new morph that deals with the problems and to set it to be triggered when both morphs are on - you can do that fairly easily (export the mesh with both morphs set, adjust in Blender, import with the Reverse deformations option set so that the new morph is only the additional changes, then use ERC Freeze to link the new morph to both shapes).
- edited March 2014
I seem to have hit a slight snag; before doing any 'serious' work I figured i'd try a simple morph to make sure it works as intended, though when I import the altered .obj from Blender's export, it chucks up an error. When I read the log, the error seems to come from there being too many vertices to be able to match them all up;
Imported: TestMorph.obj
Creating morph for Genesis 2 Female..
Vertex Count mismatch 21556:86770 (Base:Morph).
WARNING: QLayout: Attempting to add QLayout ' to DzMorphLoadDlg 'Morph Loader Advanced', which already has a layout
Reading TestMorph.obj
Vertex count mismatch in Morph Loader
Morph Loader reported no effect for the following file(s):
F:/Notes/Daz3D/Genesis2/TestMorph.objIf I understand correctly, my morph from Blender has a vertex count of 86770, when it should have 21556. The problem with that is I can't seem to find a way to export from Daz3D at a lower LOD; when I import into Blender, the mesh has many more vertices than 21556. I seem to be missing a way to export the Genesis 2 base at a lower polycount, but i'm not entirely sure how since there's no option on the exporter..?
(P.S. Thanks for the help :))
Post edited by EternalWinds on - edited December 1969
If I understand correctly, my morph from Blender has a vertex count of 86770, when it should have 21556. The problem with that is I can't seem to find a way to export from Daz3D at a lower LOD; when I import into Blender, the mesh has many more vertices than 21556. I seem to be missing a way to export the Genesis 2 base at a lower polycount, but i'm not entirely sure how since there's no option on the exporter..?
(P.S. Thanks for the help :))
That's because the option isn't an export option. It's a mesh parameter. Look under the Parameters pane > General > Mesh Resolution and set that to Base, before exporting.
- edited March 2014That's because the option isn't an export option. It's a mesh parameter. Look under the Parameters pane > General > Mesh Resolution and set that to Base, before exporting.
That did the job thanks!
Now the issue of the morph making the model tiny.. (edit) which I just fixed, didn't realise I was exporting a tiny .obj from Blender after the import auto-sized it down by a whole lot.
Post edited by EternalWinds on - edited December 1969That's because the option isn't an export option. It's a mesh parameter. Look under the Parameters pane > General > Mesh Resolution and set that to Base, before exporting.
That did the job thanks!
Now the issue of the morph making the model tiny.. (edit) which I just fixed, didn't realise I was exporting a tiny .obj from Blender after the import auto-sized it down by a whole lot.
Make sure you have the same export and import settings in Studio..
If I'm doing something in Blender that isn't really 'scale dependent'..like sculpting a morph, I'll export with the DAZ scale setting..which in Blender will be HUGE. Then I won't scale the export from Blender (just remember to have 'keep vertex order' ON in Blender import/export) but I make sure I use the DAZ scale in Morph Loader, when importing.
- edited December 1969
That was the issue, exporting from Daz3D created the 'huge' model for Blender, but when I imported it I was unaware one of the options limited the scale, so it was reduced by something like 100%; looked fine in Blender, but when I exported/imported back into Daz3D as a morph, it was trying to morph into the tiny, altered version.
Now to see if the morph is actually possible; it's going to be a fairly radical departure from a human face..!
I'll ask while i'm at it: are the eyes and teeth also affected by a morph? As in, if the .obj export from Blender has repositioned eyes (both eyelids and eyeballs), and the inside of the mouth is elongated or otherwise transformed to fit altered jaws/lips, will that also be reflected when the morph's applied to the Genesis 2?
I.e. absolutely everything from the .obj is morphed on the model, not just the 'main skin' sections?
- edited December 1969I'll ask while i'm at it: are the eyes and teeth also affected by a morph? As in, if the .obj export from Blender has repositioned eyes (both eyelids and eyeballs), and the inside of the mouth is elongated or otherwise transformed to fit altered jaws/lips, will that also be reflected when the morph's applied to the Genesis 2?
I.e. absolutely everything from the .obj is morphed on the model, not just the 'main skin' sections?
Yes, that';s right - all changes to the mesh are part of the morph.
- edited December 1969Yes, that';s right - all changes to the mesh are part of the morph.
Excellent.. well i've done a little experimentation and eye deformations do indeed carry over with the rest of the model. Unfortunately, this is where I hit my second obstacle; is there a way to exempt model parts from a morph, or are they always universal?
I made the rather innocent (though clumsy, now I think about it) mistake of separating the eyes and teeth from the Genesis base before reshaping.. fortunately I have a habit of testing every 20 minutes or so, and when I re-imported what i'd done, the morph produced a horrific, spikey nightmare!
It turns out separating the eyes and teeth from the original messed up the vertex order, and rejoining them into the same mesh didn't sort it out. It was easily replicated doing two brief morphs, one without separating any part of the mesh, the second separating eyes and teeth/gums, then rejoining; without separating the morph worked fine, but the second had the same spiked mass of a result.
The reason i'm saying all this is the method I use to reshape involves generous use of reshaping brushes; if I can't seperate the eyes and/or teeth they're at risk of being pulled around with the rest of the mesh (almost a guarantee!). If I could make the completed morph ignore those parts, I could probably make a separate morph for them after that ignores everything apart from the eyes/teeth.. sounds a little long-winded but it's the only solution I can think of to keep the eyes and teeth intact.
- edited December 1969
Can't you hide or mask them without having to delete them or cut them to a new layer?
- edited March 2014
Actually scrap that, I just realised I can just move the parts I don't want touching along an axis away from the rest then move it back the same distance when i'm done.. which doesn't split the mesh and shouldn't affect any of the vertex orders :)
**Or as you said Rich, move them to another layer without seperating anything; I thought I knew quite a lot about Blender but it turns out there's so much more that i'd never used that make it so much easier!
Post edited by EternalWinds on - edited December 1969
- edited December 1969
Blender
H - Hide Selected
Shift H - Hide Non Selected
Alt H - Unhide - edited December 1969
Thanks for the tips none01ohone, jestmart! I've tried that out and it's a better solution than moving vertices completely away then moving them back again; i'll use it in the future!
There remains only one thing now; eyes in Daz3D. I've created the morph (which changes the head shape entirely, and partially the feet) and it imports fine, morphs fine, the result is great. Now it's the textures that need redoing.
But I found a slight hiccup; the eyes are now in a different position, slightly enlarged and further apart, with the unforeseen consequence that the eye bone is in the same place, away from the center of the eye sphere.. so rotating launches them out of the eye socket on most axes, which is fun to play with but isn't exactly what I intended!
Two questions, two obvious solutions; can the eye bones be relocated so the eyes rotate 'on the spot', inside the socket? If not, is the only realistic option to leave the eyes where they were (I assume their size doesn't matter as long as they're still central to the original position), then reposition them separate to the morph to keep proper rotation?
- edited December 1969
It should happen when we make morph.
By your morph, the vertices only changed but rigs not auto-follow.
it often cause problem when you pozing.then you need to adjust rigs by joint editor tool, or use 'adjust rigs to the shape'
and ERC freeze .(after that, when you apply the orignal morph the rigs move and fit to the shape,
as you made)Fortunately, there are many tutoriall or topic about how to adjust rigs and ERC freeze, like this.
Basics: Character Creation for GenesisBut Unfortunately, this tutorial is for ds 4.0 ,some tools have changed or improved, about ERC,
but I think you can grab how to,.